简介与安装 链接到标题
Hugo 是一个用 Go 编写的静态网站生成器,可以轻松生成个人博客。
Hugo 安装起来也非常方便,以下是 Hugo 的安装命令:
brew install hugo # mac
sudo apt install hugo # Debian
scoop install hugo # windows
Windows 推荐使用 scoop 包管理器,非常好用
安装好 Hugo 后,执行 hugo new site blog 就会在当前目录下创建名为 blog 的目录,Hugo 后续将基于该目录中的内容来创建网站。
主题配置 链接到标题
这里介绍了三个个人比较喜欢的 Hugo 主题的配置方案。读者可以自选其一,我是部署了三个博客网站,当然只有一个能被搜索引擎检索到。
PaperMod 链接到标题
安装主题 链接到标题
在 blog 目录下,执行以下命令:
git submodule add --depth=1 https://github.com/adityatelange/hugo-PaperMod.git themes/PaperMod
git submodule update --init --recursive # needed when you reclone your repo (submodules may not get cloned automatically)
主题就被安装在了 blog/themes/PaperMod 目录下,该目录下就是 PaperMod 主题的源码。
如果要更新主题,在 blog 目录下执行 git submodule update --remote --merge 即可。
在
blog/themes/PaperMod目录下执行git pull origin master也可以更新。
配置文件 链接到标题
Hugo 读取配置文件非常灵活,既可以把所有配置都写在 blog 目录下的 hugo.toml 或者 config.toml 中,也可以在 blog/config/_default 目录下,将 hugo.toml 配置分成几个配置文件来编写,如下所示:
blog/config/_default on main [✘!?]
❯ ls
hugo.toml markup.toml menu.zh.toml outputs.toml params.en.toml params.zh.toml privacy.toml
hugo.en.toml hugo.zh.toml menu.en.toml minify.toml papermod.yml.bak params.toml permalinks.toml services.toml
基础配置 链接到标题
在 hugo.toml 中,我们可以写入单配置文件下的 hugo.toml 或者 config.toml(后简称 hugo.toml)中的不属于任何 table 的键值对信息,hugo.toml 中除 languages 外的 table,都可以单独作为一个配置文件。
而 hugo.toml 中的 langauges table 中的内容,可以写到对应语言的 hugo.${lang}.toml 中,如 hugo.zh.toml,hugo.en.toml 中。如下所示:
注意 hugo.toml 中的 defautlContentLanguage 的值一定是 hugo.zh.toml 或者 hugo.en.toml 中的 languageCode 的值。hugo.toml 中的 languages table 与 hugo.zh.toml 存在对应关系,[languages.xx] 即对应 langaugeCode = "xx",其他键值对直接复制过去即可。hugo.en.toml 的处理方法类似。
杂项配置 链接到标题
hugo.toml 中的 markup、outputs、minify、privacy、services、permalinks 这几个 table 类似。 [markup] 下的内容可以都放到 markup.toml 中去,以此类推。
params 配置 链接到标题
最后是内容最多的 params table,它还有许多 subtable。
[[languages.zh.params.profileMode.buttons]] 与 params.zh.toml 中的 `[[profileMode.butteons]] 对应,依此类推。
添加 Latex 支持 链接到标题
在 blog/layouts/partials 目录下创建 math.html 文件,文件内容如下
<link rel="stylesheet" href="https://cdn.jsdelivr.net/npm/katex@0.16.2/dist/katex.min.css" integrity="sha384-bYdxxUwYipFNohQlHt0bjN/LCpueqWz13HufFEV1SUatKs1cm4L6fFgCi1jT643X" crossorigin="anonymous">
<script defer src="https://cdn.jsdelivr.net/npm/katex@0.16.2/dist/katex.min.js" integrity="sha384-Qsn9KnoKISj6dI8g7p1HBlNpVx0I8p1SvlwOldgi3IorMle61nQy4zEahWYtljaz" crossorigin="anonymous"></script>
<script defer src="https://cdn.jsdelivr.net/npm/katex@0.16.2/dist/contrib/auto-render.min.js" integrity="sha384-+VBxd3r6XgURycqtZ117nYw44OOcIax56Z4dCRWbxyPt0Koah1uHoK0o4+/RRE05" crossorigin="anonymous"></script>
<script>
    document.addEventListener("DOMContentLoaded", function() {
        renderMathInElement(document.body, {
          // customised options
          // • auto-render specific keys, e.g.:
          delimiters: [
              {left: '$$', right: '$$', display: true},
              {left: '$', right: '$', display: false},
              {left: '\\(', right: '\\)', display: false},
              {left: '\\[', right: '\\]', display: true}
          ],
          // • rendering keys, e.g.:
          throwOnError : false
        });
    });
</script>
将 blog/themes/PaperMod/layouts/partials 目录下的extend_head.html 文件复制到 blog/layouts/partials/extend_head.html 下
{{ if or .Params.math .Site.Params.math }}
{{ partial "math.html" . }}
{{ end }}
设置侧边显示目录 链接到标题
复制 themes/PaperMod/layouts/partials/toc.html 到 layouts/partials/ 目录下,然后编辑 toc.html,在 </div> 和 {{- end }} 之间追加以下内容:
<script>
    let activeElement;
    let elements;
    window.addEventListener('DOMContentLoaded', function (event) {
        checkTocPosition();

        elements = document.querySelectorAll('h1[id],h2[id],h3[id],h4[id],h5[id],h6[id]');
         // Make the first header active
         activeElement = elements[0];
         const id = encodeURI(activeElement.getAttribute('id')).toLowerCase();
         document.querySelector(`.inner ul li a[href="#${id}"]`).classList.add('active');
     }, false);

    window.addEventListener('resize', function(event) {
        checkTocPosition();
    }, false);

    window.addEventListener('scroll', () => {
        // Check if there is an object in the top half of the screen or keep the last item active
        activeElement = Array.from(elements).find((element) => {
            if ((getOffsetTop(element) - window.pageYOffset) > 0 &&
                (getOffsetTop(element) - window.pageYOffset) < window.innerHeight/2) {
                return element;
            }
        }) || activeElement

        elements.forEach(element => {
             const id = encodeURI(element.getAttribute('id')).toLowerCase();
             if (element === activeElement){
                 document.querySelector(`.inner ul li a[href="#${id}"]`).classList.add('active');
             } else {
                 document.querySelector(`.inner ul li a[href="#${id}"]`).classList.remove('active');
             }
         })
     }, false);

    const main = parseInt(getComputedStyle(document.body).getPropertyValue('--article-width'), 10);
    const toc = parseInt(getComputedStyle(document.body).getPropertyValue('--toc-width'), 10);
    const gap = parseInt(getComputedStyle(document.body).getPropertyValue('--gap'), 10) ;

    function checkTocPosition() {
        const width = document.body.scrollWidth;

        if (width - main - (toc * 2) - (gap * 4) > 0) {
            document.getElementById("toc-container").classList.add("wide");
        } else {
            document.getElementById("toc-container").classList.remove("wide");
        }
    }

    function getOffsetTop(element) {
        if (!element.getClientRects().length) {
            return 0;
        }
        let rect = element.getBoundingClientRect();
        let win = element.ownerDocument.defaultView;
        return rect.top + win.pageYOffset;
    }
</script>
然后在 assets/css/extended 目录下创建 toc.css 文件,内容为:
:root {
    --nav-width: 1380px;
    --article-width: 650px;
    --toc-width: 250px;
}

.toc {
    margin: 0 2px 40px 2px;
    border: 1px solid var(--border);
    background: var(--entry);
    border-radius: var(--radius);
    padding: 0.4em;
}

.toc-container.wide {
    position: absolute;
    height: 100%;
    border-right: 1px solid var(--border);
    left: calc((var(--toc-width) + var(--gap)) * -1);
    top: calc(var(--gap) * 2);
    width: var(--toc-width);
}

.wide .toc {
    position: sticky;
    top: var(--gap);
    border: unset;
    background: unset;
    border-radius: unset;
    width: 100%;
    margin: 0 2px 40px 2px;
}

.toc details summary {
    cursor: zoom-in;
    margin-inline-start: 20px;
    padding: 12px 0;
}

.toc details[open] summary {
    font-weight: 500;
}

.toc-container.wide .toc .inner {
    margin: 0;
}

.active {
    font-size: 110%;
    font-weight: 600;
}

.toc ul {
    list-style-type: circle;
}

.toc .inner {
    margin: 0 0 0 20px;
    padding: 0px 15px 15px 20px;
    font-size: 8px;

    /*目录显示高度*/
    max-height: 83vh;
    overflow-y: auto;
}

.toc .inner::-webkit-scrollbar-thumb {
    /*滚动条*/
    background: var(--border);
    border: 7px solid var(--theme);
    border-radius: var(--radius);
}

.toc li ul {
    margin-inline-start: calc(var(--gap) * 0.5);
    list-style-type: none;
}

.toc li {
    list-style: none;
    font-size: 0.95rem;
    padding-bottom: 5px;
}

.toc li a:hover {
    color: var(--secondary);
}
doit 链接到标题
这个主题非常完善了,奈何
部署博客 链接到标题
Hugo 博客可以很容易的部署到 Vercel 或者 Netlify 上,二者均免费。
部署至 Vercel 链接到标题
首先在 blog/ 目录下创建 vercel.json 文件,添加以下内容:
{    "github": {
        "silent": true
    }
}
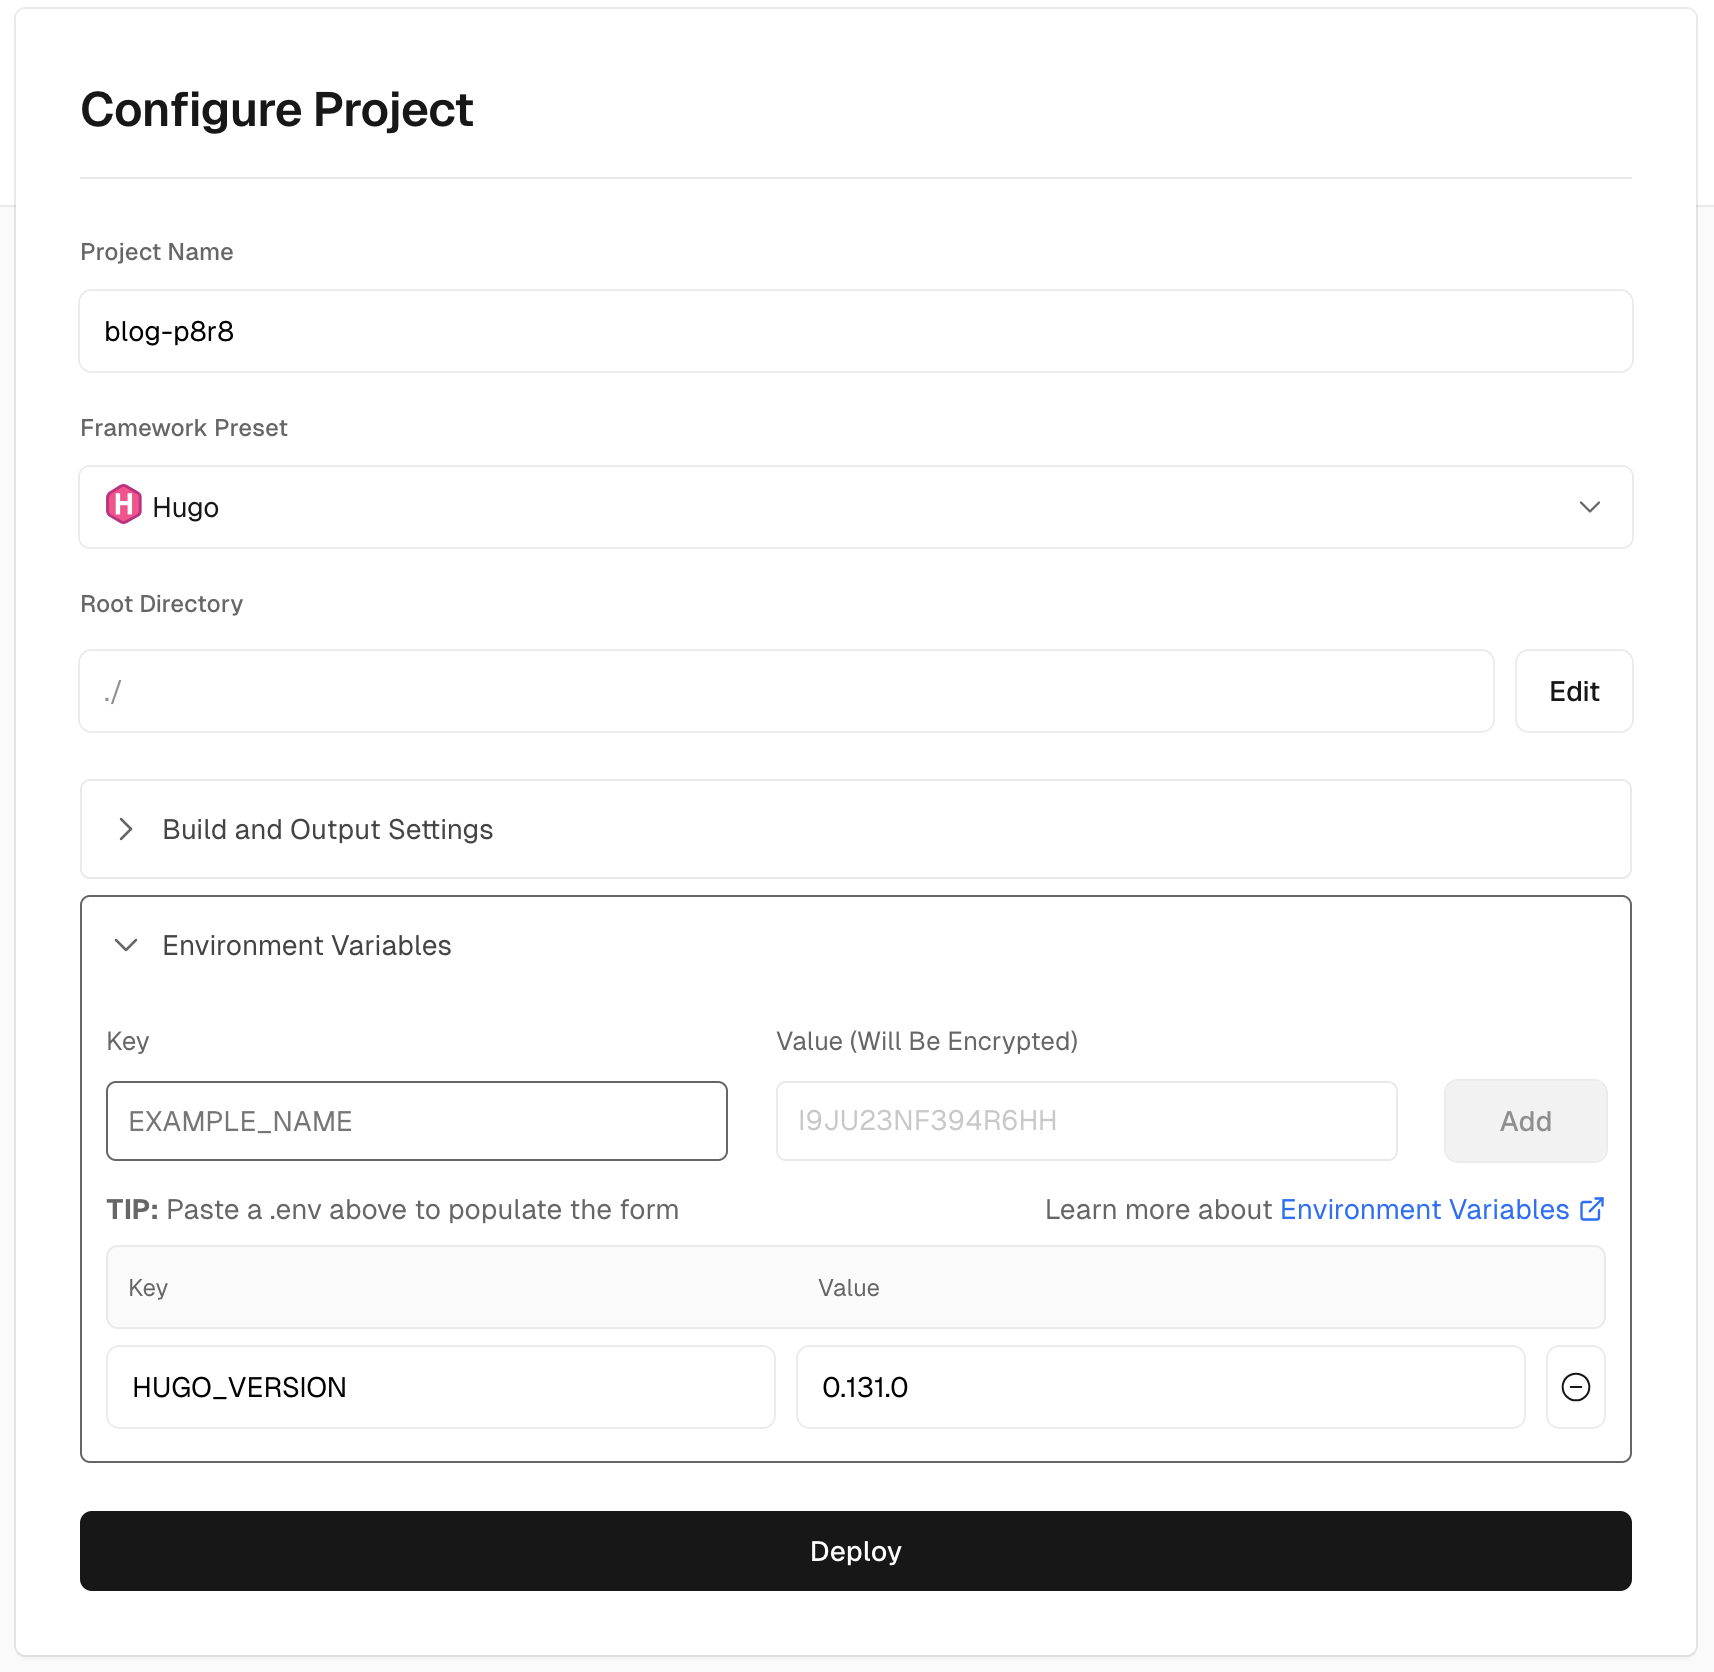
将这个博客项目 push 到 GitHub,然后 Vercel 添加新项目,选择从 Import Git Repository,注意 GitHub App 权限问题,添加该项目,然后 Framework Preset 选择 Hugo,Environment Variables 设置 Key 为 HUGO_VERSION,Value 设置为当前最新 hugo 的版本号。
如下图所示,点击 Deploy 即可:
注意,不管是部署到 Vercel 还是 Netlify,git submodule 对应的 repo 一定不能是私有的,即只能通过 https 去 clone submodule!
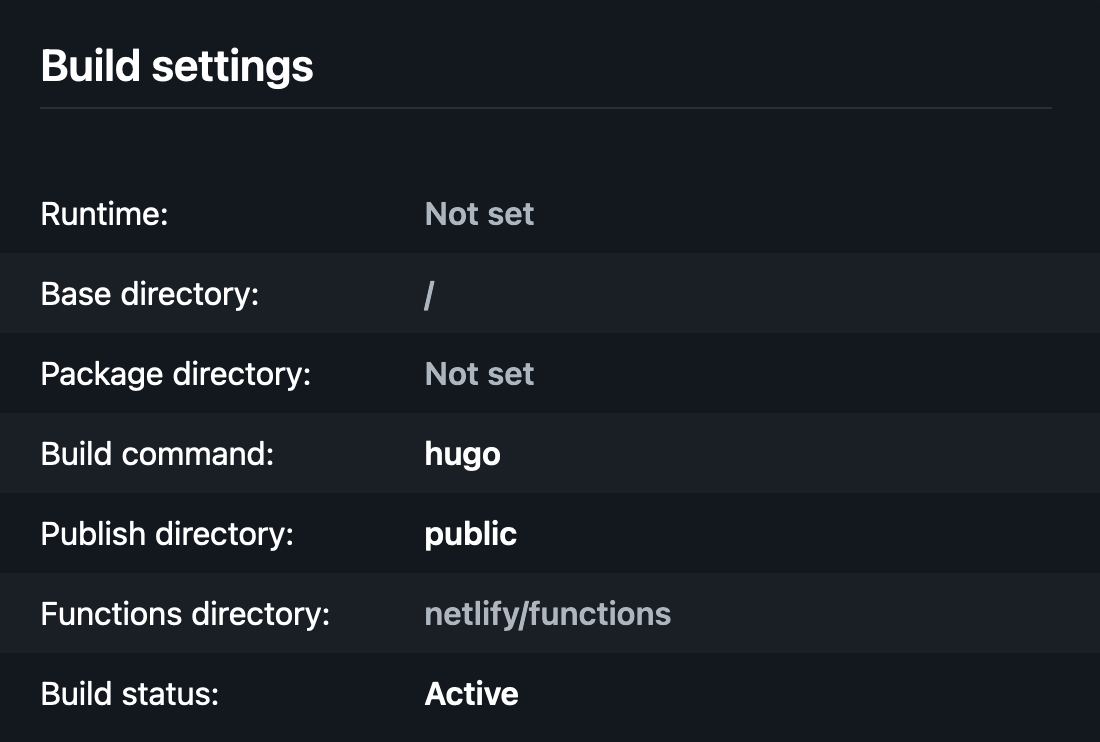
部署至 Netlify 链接到标题
部署步骤类似,几乎可以说是傻瓜式的,点击 Deploy 之前,build settings 设置成如下即可,同样记得设置环境变量,netlify 默认使用的是 hugo extended 版本。